Originally posted at http://mywebpages.comcast.net/gsussman/differential_fluid_change.htm

Differential Fluid Change


This is one of those things that you need to make some preparations ahead of time to do.

Approximate time required: 2 hours

Parts List:
  1. Rear Diff gear oil (Fully Synthetic Gear Oil 75W-90) 2 Liters
  2. Gear oil pump or 3 feet of vinyl tubing.
  3. 14mm Hex drive socket or Allen Wrench (www.snapon.com)
  4. 14mm Combination Wrench
  5. Replacement Differential Plug (x2) (Dealer Part) (Optional)
  6. Replacement Differential Plug Gasket (x2) (Dealer Part)


Before proceeding, I am going to ask you to do something I know you all hate to do. Take your baby out for a spirited drive! You want to ensure that the differential fluid gets good and mixed up, as well as warmed up to normal operating temp. This will ensure that as many of the fine metal particles as possible will be suspended in the oil when you drain it. 15 minutes at highway speed should more than do the trick. If you have never before changed your differential fluid, you will be amazed at the quantity of metal particles that are suspended in the oil. The particles should make the oil look like a metalic car paint. Particles should be very very small. If you get lots of stuff about the size of glitter, you have a problem!

Jack the car up so that you can crawl under it. (See my notes on top of the fuel filter replacement page about jacking up the car)

Ensure the car is nearly level. Failure to do so will result in an improperly filled differential.

As you can see, I used ramps in the front and jackstands in the back. As luck would have it, the car happened to be dead on level...lucky me!

Be careful beyond this point. If you followed the instructions at the top of the page, the differential is nicely warmed up, as are all of the exhaust components. They are capable of giving you a lovely and semi permanent tattoo on any exposed skin that touches them.

Looking from the rear of the car, you can easily see the fluid fill plug on the back of the differential rear cover. The fluid drain plug is located on the left side lower edge of the differential. (You can barely see it in this photo behind the exhaust brace)
Use your 14mm socket to remove the drain plug.

Once draining has started, remove the fill plug. This will speed the entire process up and prepare you for the next step.

Note: As you can see, the left side exhaust pipe prevented me from using a socket on the 14mm drive. An adjustable wrench did the trick. The same was true for the fill plug. 

Once all of the oil has been drained out, replace the lower drain plug with the new plug and gasket and torque to 70Nm.

(For me there was no way I could get a torque wrench on either of the two plugs, so I had to use the Ol' Calibrated Arm method)

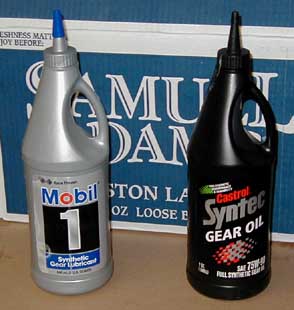
Refill the diffential with the gear oil until it begins to flow back out of the filler hole. (This should be about 1.6L of oil)

Install and torque the filler hole plug to 70Nm.

Having a gear oil pump on hand will make your job much easier. However it can be done with a section of clear vinyl tubing pressed and taped over the spout on the oil container. To get the container above the level of the differential, I found I could work it up into the area near the CV joint on the passengers side. Had to squeeze the bottle to get a steady flow, but it worked. If you don't have either, go buy one or the other. The job can not be done without them!


That's it, you are done!

Lower the car, and take it out for a spin!